When your supplies spill out of bins and drawers, it feels like you ran out of space. Most of us do not need more shelves. We need smarter craft storage. The fastest fix is to look at what you already own and give it a new job. In this guide, I share simple, beginner-friendly diy craft storage ideas that cost nothing. We will repurpose household items to hold buttons, paint, fabric, yarn, beads, and more. These upcycled crafts reduce clutter and waste at the same time.
I use these tricks in my own sewing and craft corner. They work in apartments, closets, and tiny nooks. Start with one idea. Then build your system one shelf at a time.
Why upcycling works for craft rooms
Before you buy new bins, try reuse first. Reuse is higher on the waste pyramid than recycle, so it cuts trash and saves money. The EPA explains that reducing and reusing materials helps the environment and the economy. US EPA When an item truly has no second life, you can still recycle many common materials, like glass, paper, metal, and some plastics, but reuse comes first.
Tip: Set a small “reuse box” near your desk. Drop clean jars, trays, and tins into it. When you reorganize, shop that box first.
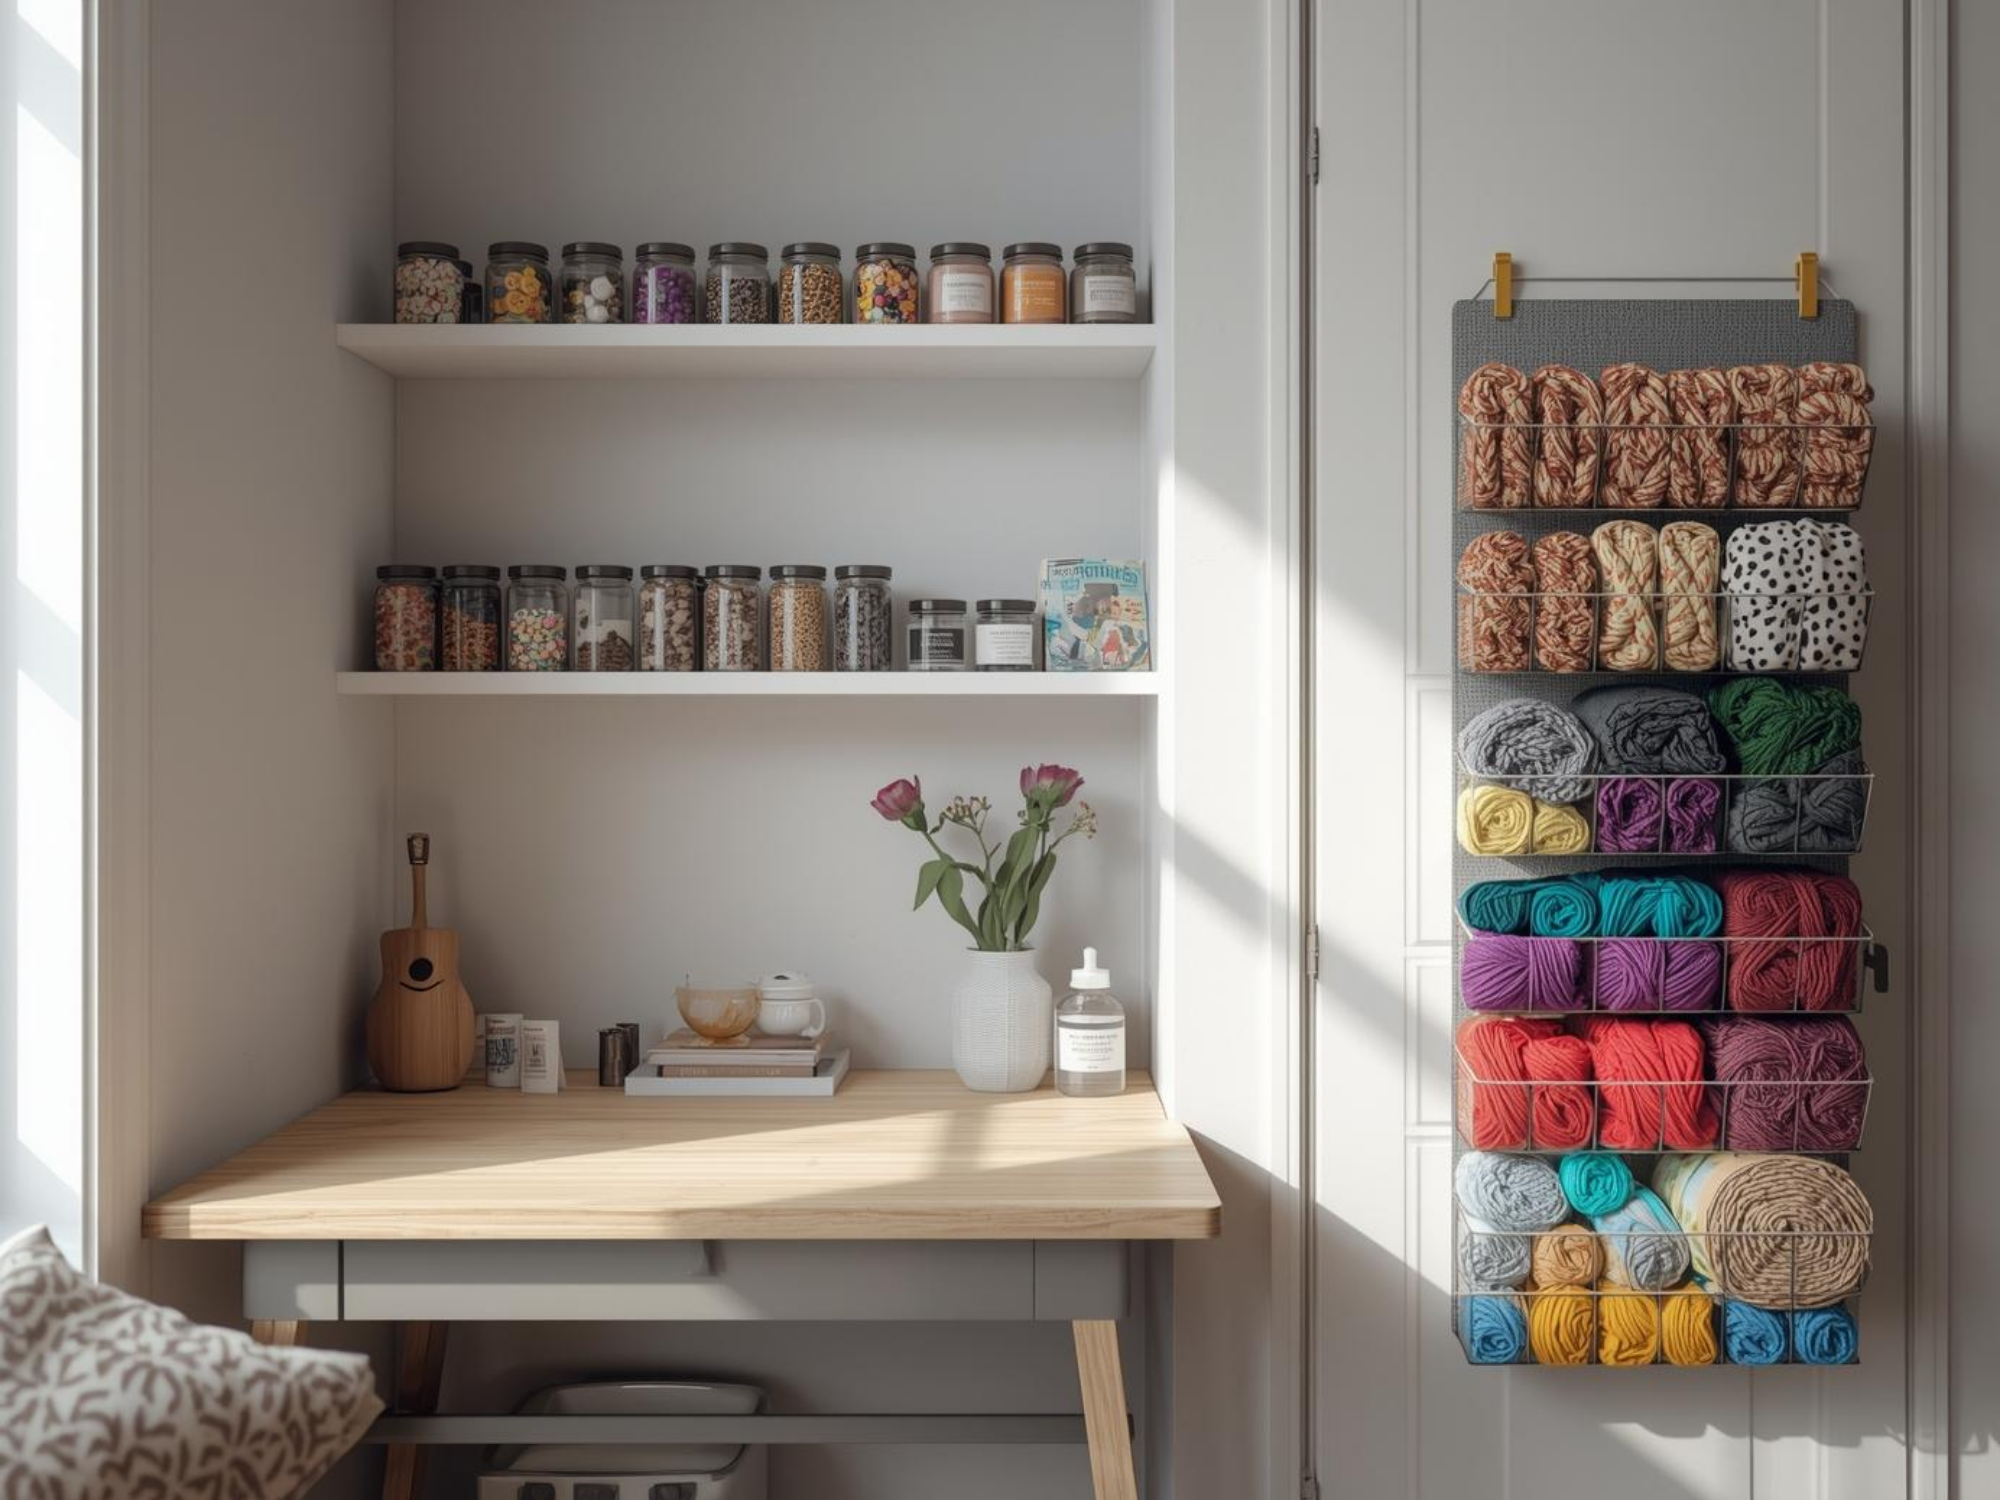
Jam jars for buttons and tiny notions
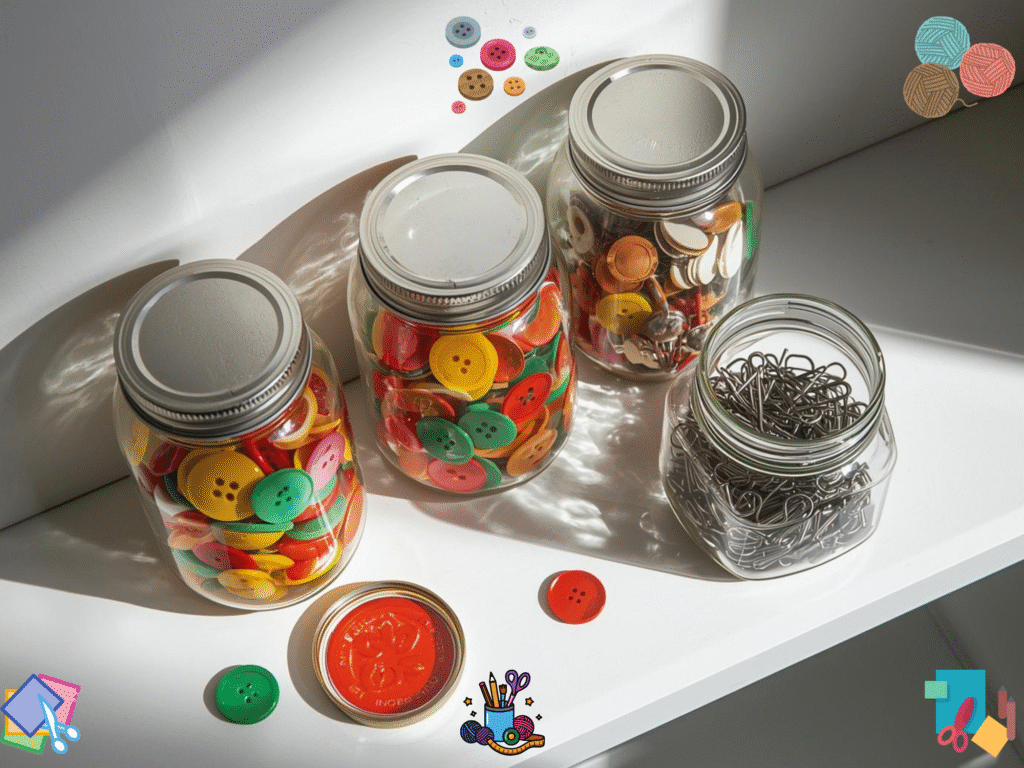
Save empty jam or pasta sauce jars. Wash, dry, and peel labels. Sort buttons by color. You can also fill jars with snaps, safety pins, needles, or glitter. Clear glass lets you see the contents fast, which speeds up projects. For more jar ideas, see this guide to reusing glass jars for craft room storage.
Safety note: Use a wide-mouth jar for easy reach. Keep glass off the edge of your table if you sew with kids or pets nearby.
Internal resource: Grab my printable label sheets and simple color key inside our free tools on Trusti ASG.
Spice racks or picture ledges for paint bottles
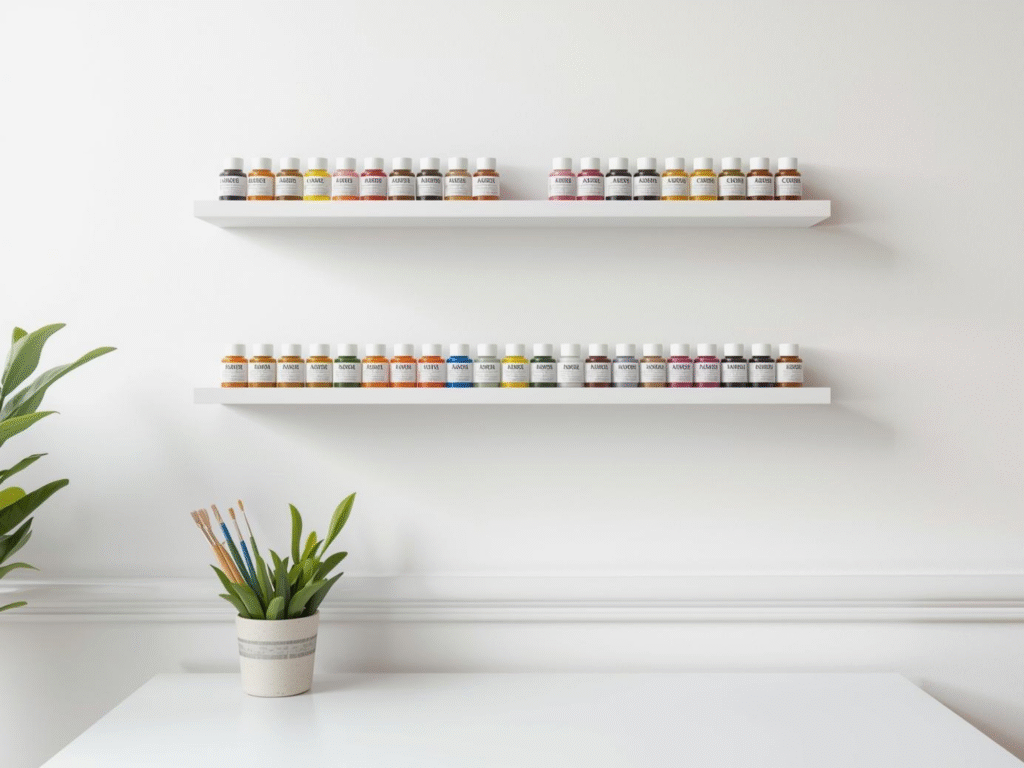
A simple spice rack can turn odd wall space into a neat paint display. Picture ledges also work for 2-oz craft paints and keep labels facing out, so you can see colors at a glance. Here is a walk-through that uses shallow wall ledges for vertical paint storage.
Pro move: Sort warm colors on one shelf and cool colors on the next. Put metallics together so you can grab them for accents.
An old bookshelf for folded fabric
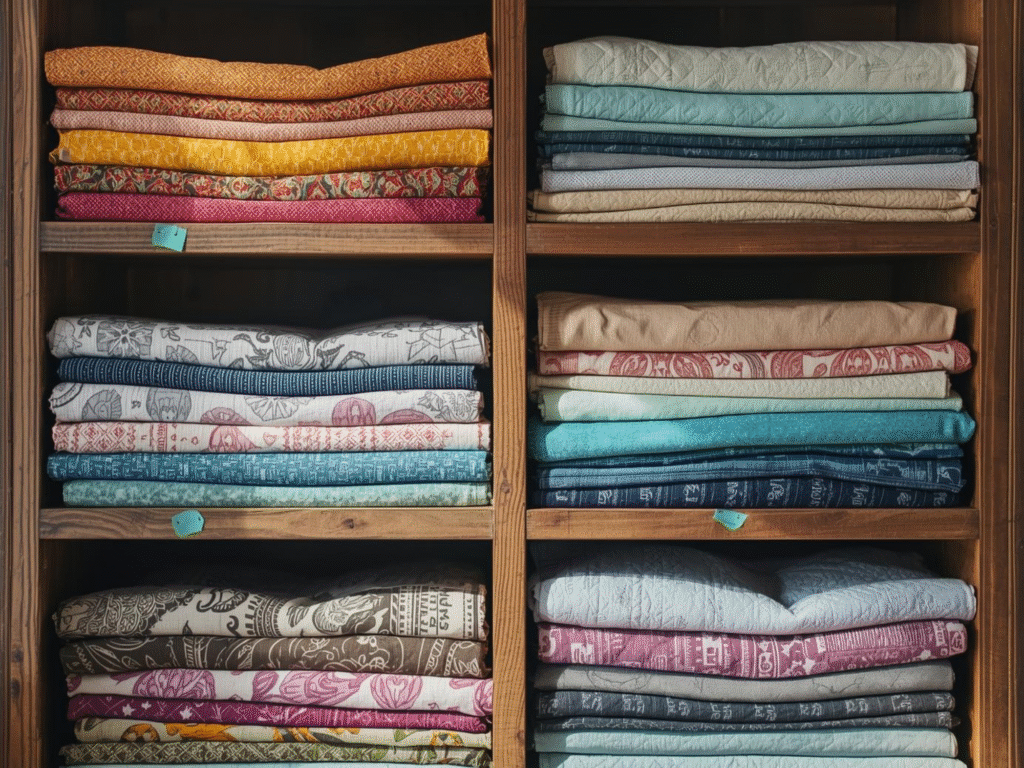
Give a tired bookcase a second life. Wipe it down, then line the shelves with folded fabric “mini bolts.” Comic book boards help your folds stand tall and uniform. They also make your stash easy to scan by color or print size. Try this step-by-step on wrapping fabric onto boards for tidy shelf storage.
Set a simple rule: Fabric you can see is fabric you will use. Deep stacks hide prints and lead to repeat buys. Shallow stacks stop that.
Over-the-door shoe organizers for yarn and tools
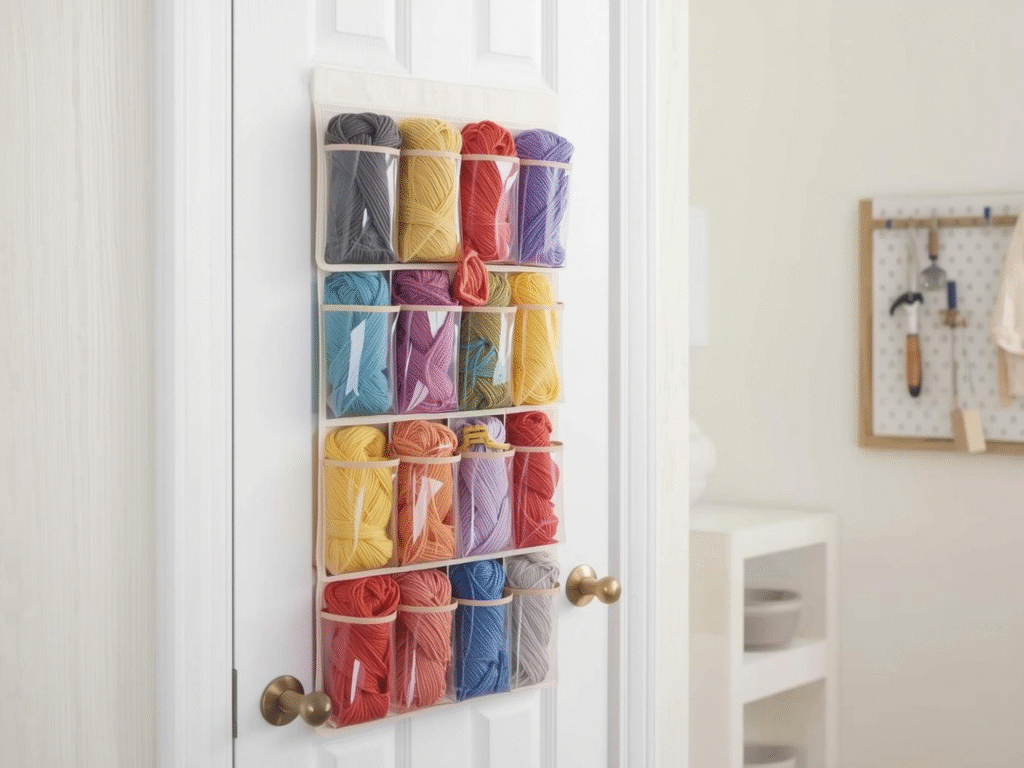
A clear pocket shoe organizer is a small-space hero. Slip one over a closet or craft room door. Each pocket holds a skein, two small paints, or a set of markers. It uses vertical space you already have. Many makers use pocket organizers for yarn and craft supplies because it keeps items visible and tangle-free.
Yarn tip: Store one color per pocket. Tuck the label behind the skein so you still have fiber and dye lot info. If you prefer wall storage, pegboards can also hold yarn neatly.
Muffin tins for beads, snaps, and sequins
Old muffin pans make perfect trays for tiny parts. Set one on your desk and sort beads by color or size. This keeps small items from rolling under your machine and keeps your hands free while you work. Using muffin tins for organizing small craft items is a simple, proven hack.
Quick hack: Lay a piece of plastic wrap over the pan when you take a break. Your layout will stay put until you are ready to craft again.
More quick wins you can try today
These DIY craft room storage ideas take under 15 minutes each.
- Paper towel holder for ribbon. Slide spools onto the rod and pull what you need. A spare tension rod between two shelves works too.
- Cutlery trays for tools. Sort scissors, rotary cutters, glue sticks, and chalk into shallow kitchen trays. They fit most drawers.
- Magazine files for patterns. Store printed patterns, interfacing scraps, and vinyl sheets upright so they do not crease.
- Wine rack for thread or yarn cakes. Cubby-style racks corral spools or wound yarn cakes and look cheerful on a shelf.
- Cereal boxes as drawer dividers. Cut to height, wrap in scrap paper, and label. Free, fast, and custom sized.
- Binder clips and hangers for fabric WIPs. Clip blocks and pieces and hang them so projects do not vanish under piles.
A simple 20-minute reset that keeps order
Great craft storage is not a one-time task. It is a small habit. Here a my weekly reset:
- Sort by task. Keep cutting tools together, sewing items together, and paint items together.
- Label once. Use plain masking tape and a marker to label jars and bins as you go.
- Set a limit. One shelf for fabric scraps, one jar for buttons. When it is full, use scraps in a small project or gift them.
- Return items. End each session with two minutes of put-back time.
- Recycle the rest. If a container will not work in your space, recycle it if allowed in your area. Check recycling rules for your city
This 20-minute rhythm beats a yearly marathon clean-up. It keeps your desk clear and your ideas moving.
How to choose what to repurpose
Use this quick guide to pick the right piece for the job:
- Size match. Small parts need small compartments. That is why jars and muffin tins shine.
- Visibility. Clear or open storage helps you use what you own.
- Reach. Daily tools should live between knee and shoulder height. Reserve tall shelves for backups.
- Safety. Keep sharp blades in a tray with a lid. Store heavy glass on sturdy shelves.
- Fit and flow. If the item is awkward or tips over, try a different container.
Eco-friendly habits that support your system
Upcycling is a type of recycle craft. You turn “waste” into something useful and save it from the bin. If you do need to recycle, learn what your curbside program accepts and keep items loose and clean. Keeping a small reuse stash plus clear recycling rules will make repurposing household items for organization feel easy.
Build your plan with free help
If you like checklists and simple layouts, download our free planners and mini-guides on Trusti ASG. You will find step-by-step diy craft storage ideas, quick measuring guides, and labels you can print. Start with one shelf, one drawer, or one door. Win a tiny space. Then repeat next week.
Put it all together
These simple swaps are great upcycled craft ideas. They make strong, low-cost craft storage and help you see what you have. When you can see your supplies, you use them. When you use them, your space clears and your projects finish faster.
I have seen this in my own space more than once. A shelf of jars brought my buttons out of hiding. A $0 picture ledge found in the garage turned into a paint station. A closet door now holds a month of skeins. These are small changes, but they stack up.
Start with one drawer or one shelf. Use what you have. Label as you go. In a week, your craft storage will feel new, even though you did not buy a thing. That is the power of upcycled crafts and diy craft room storage ideas. It is green. It is fast. It works.
Free Zero-Cost Craft Storage Planner
Download the free, easy-to-use template in the link below to make life a little easier for you as you start your fast crafting journey:
Keep learning
Want more step-by-step plans and printable labels to keep everything in place? Visit Trusti ASG for free templates and guides you can use today. Then come back and try another idea from this list. Your future self will thank you.