If you feel like your projects take too long because you are always moving piles or hunting for scissors, you are not alone. A smart sewing room layout fixes that. The idea is to group your tools into clear zones and place those zones in a triangle for short, easy steps. In this post, I will show you how to set up a sewing station, a cutting station, and a pressing station so you can work faster and feel less cramped. I will also share craft space ideas that fit in small rooms and corners.
Want more on storage, carts, and tiny-room wins? See our guides on Trusti ASG like the Closet Craft Studio Planner and our tips on sewing room setup.
What Is the “Sewing Triangle”
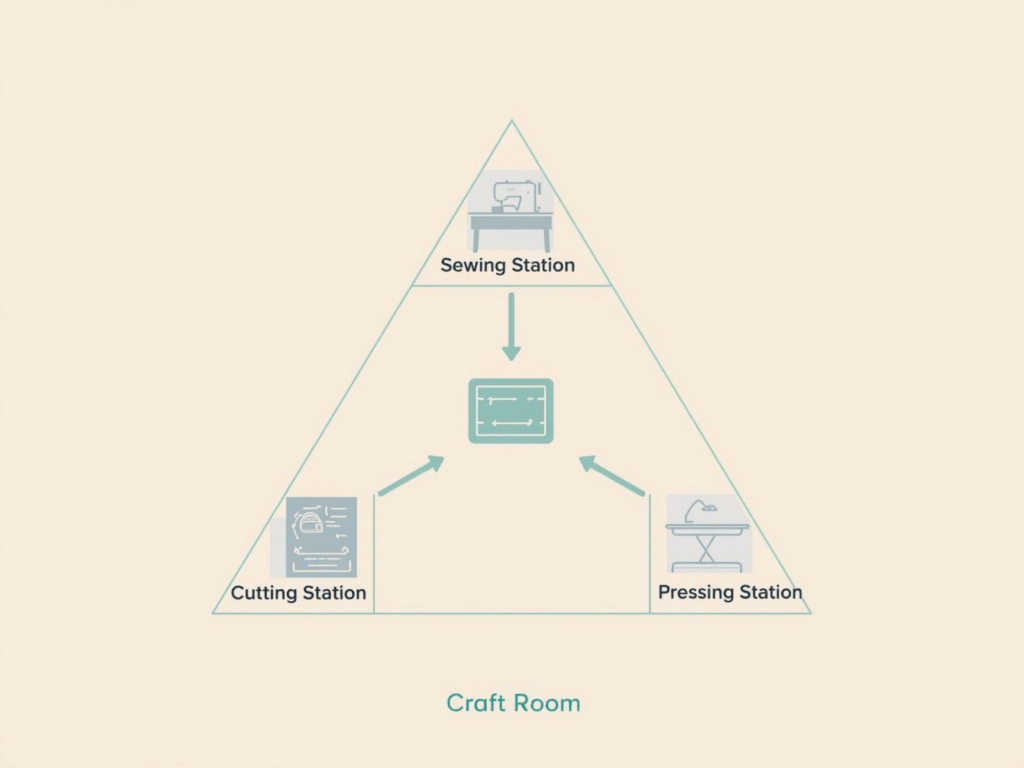
The sewing triangle borrows from the kitchen work triangle. In kitchens, pros place the fridge, sink, and stove in a triangle to cut down steps and boost flow. You can do the same with your sewing room layout by putting your sewing station, cutting station, and pressing station at the three points. This reduces back-and-forth and keeps traffic out of your path. The kitchen triangle idea dates to the 1940s and is still a helpful way to plan zones and movement.
Map Your Three Core Zones
Before you move furniture, sketch your room on paper. Mark power outlets, natural light, and any doors. Then place three labels:
- Sewing station
- Cutting station
- Pressing station
Connect them with lines to form your triangle. Leave clear walking lanes. Keep storage for each task inside that zone so you do not drag bins across the room. When you follow this plan, your sewing room layout feels simple and calm.
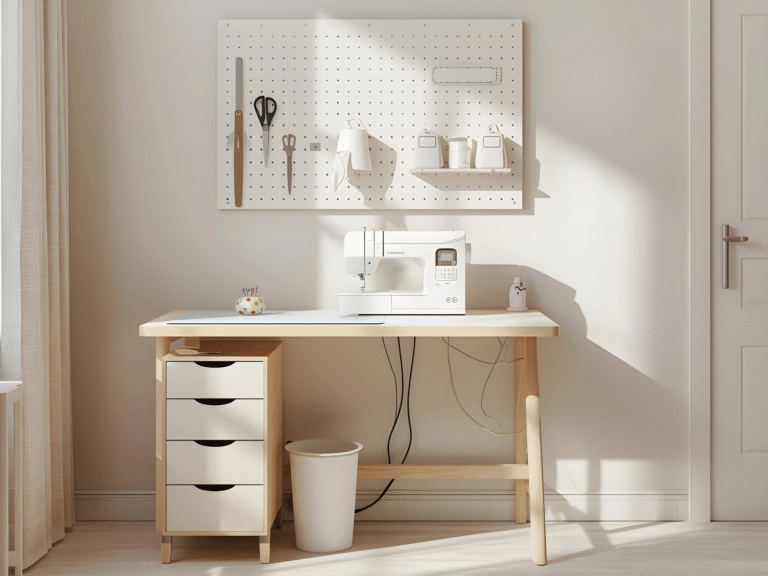
Sewing Station: Smooth, Seated Work

Your sewing station is where you sit and stitch. Keep what you touch every few minutes within arm’s reach.
Must-haves
- Machine on a sturdy table
- Chair adjusted so your forearms are level when you sew
- Task light that does not cast shadows
- Small mat for snips, seam ripper, extra needles, and bobbins
- Thread rack or drawer dividers by color or fiber
Placement tips
- Set the table near a wall outlet to avoid cord tangles.
- Place a small rolling cart to your side for notions.
- If two people sew, put a narrow shelf or pegboard between machines so tools have a home.
For fit and comfort, many sewists aim for a table height that keeps the elbow near a right angle while seated. If your chair and table adjust, test until your shoulders feel relaxed and your wrists stay straight. Several sewing ergonomics guides recommend building tables around your body rather than forcing your body to fit a fixed table.
Cutting Station: Big, Flat, and Safe
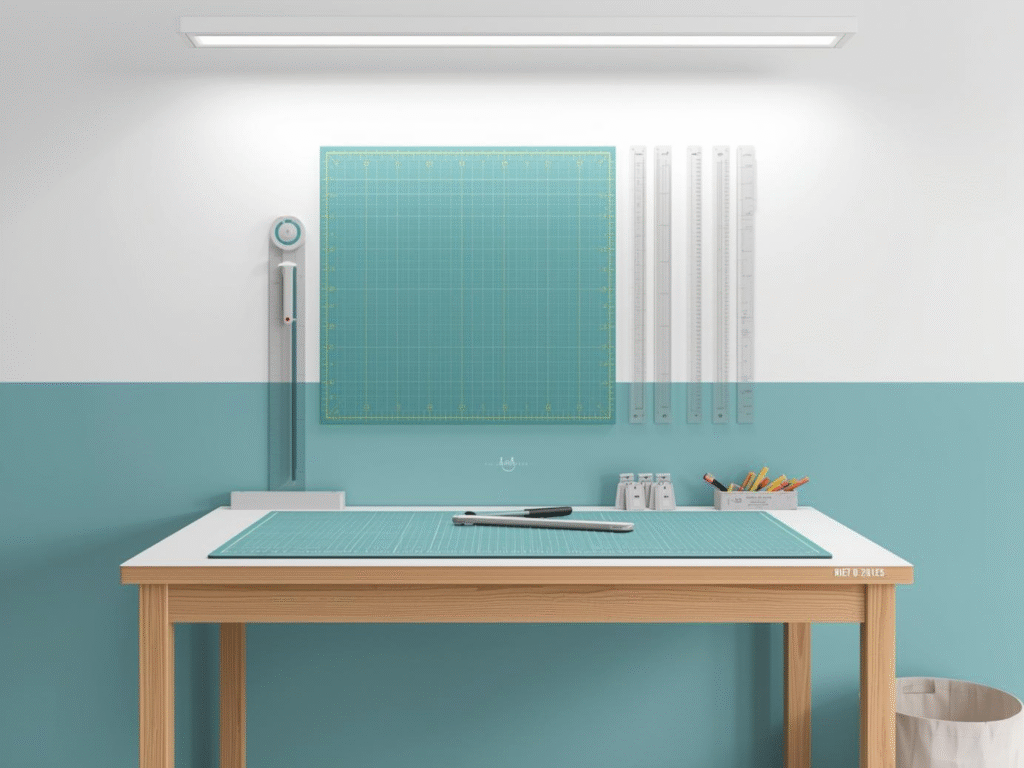
Your cutting station needs a flat surface that fits your mat and fabric. Aim for a height that reduces bending. A common guideline is to set the top around elbow height when you stand with arms relaxed, sometimes a touch lower so your elbows do not hit. If your table is too low, use risers or an adjustable workbench.
Must-haves
- Self-healing mat sized to your projects
- Rotary cutter and sharp shears
- Rulers hung on hooks for fast access
- Small bin for offcuts and threads
- Pattern weights in a tray
Placement tips
- Store rulers vertically at the end of the table.
- Keep the rotary cutter on the right or left edge, matching your dominant hand.
- Mount a magnetic strip for small metal tools so they do not hide under fabric.
For step-by-step zone examples, you can study how other sewists define cutting vs pressing spaces to see what often gets in the way and how they fix it.
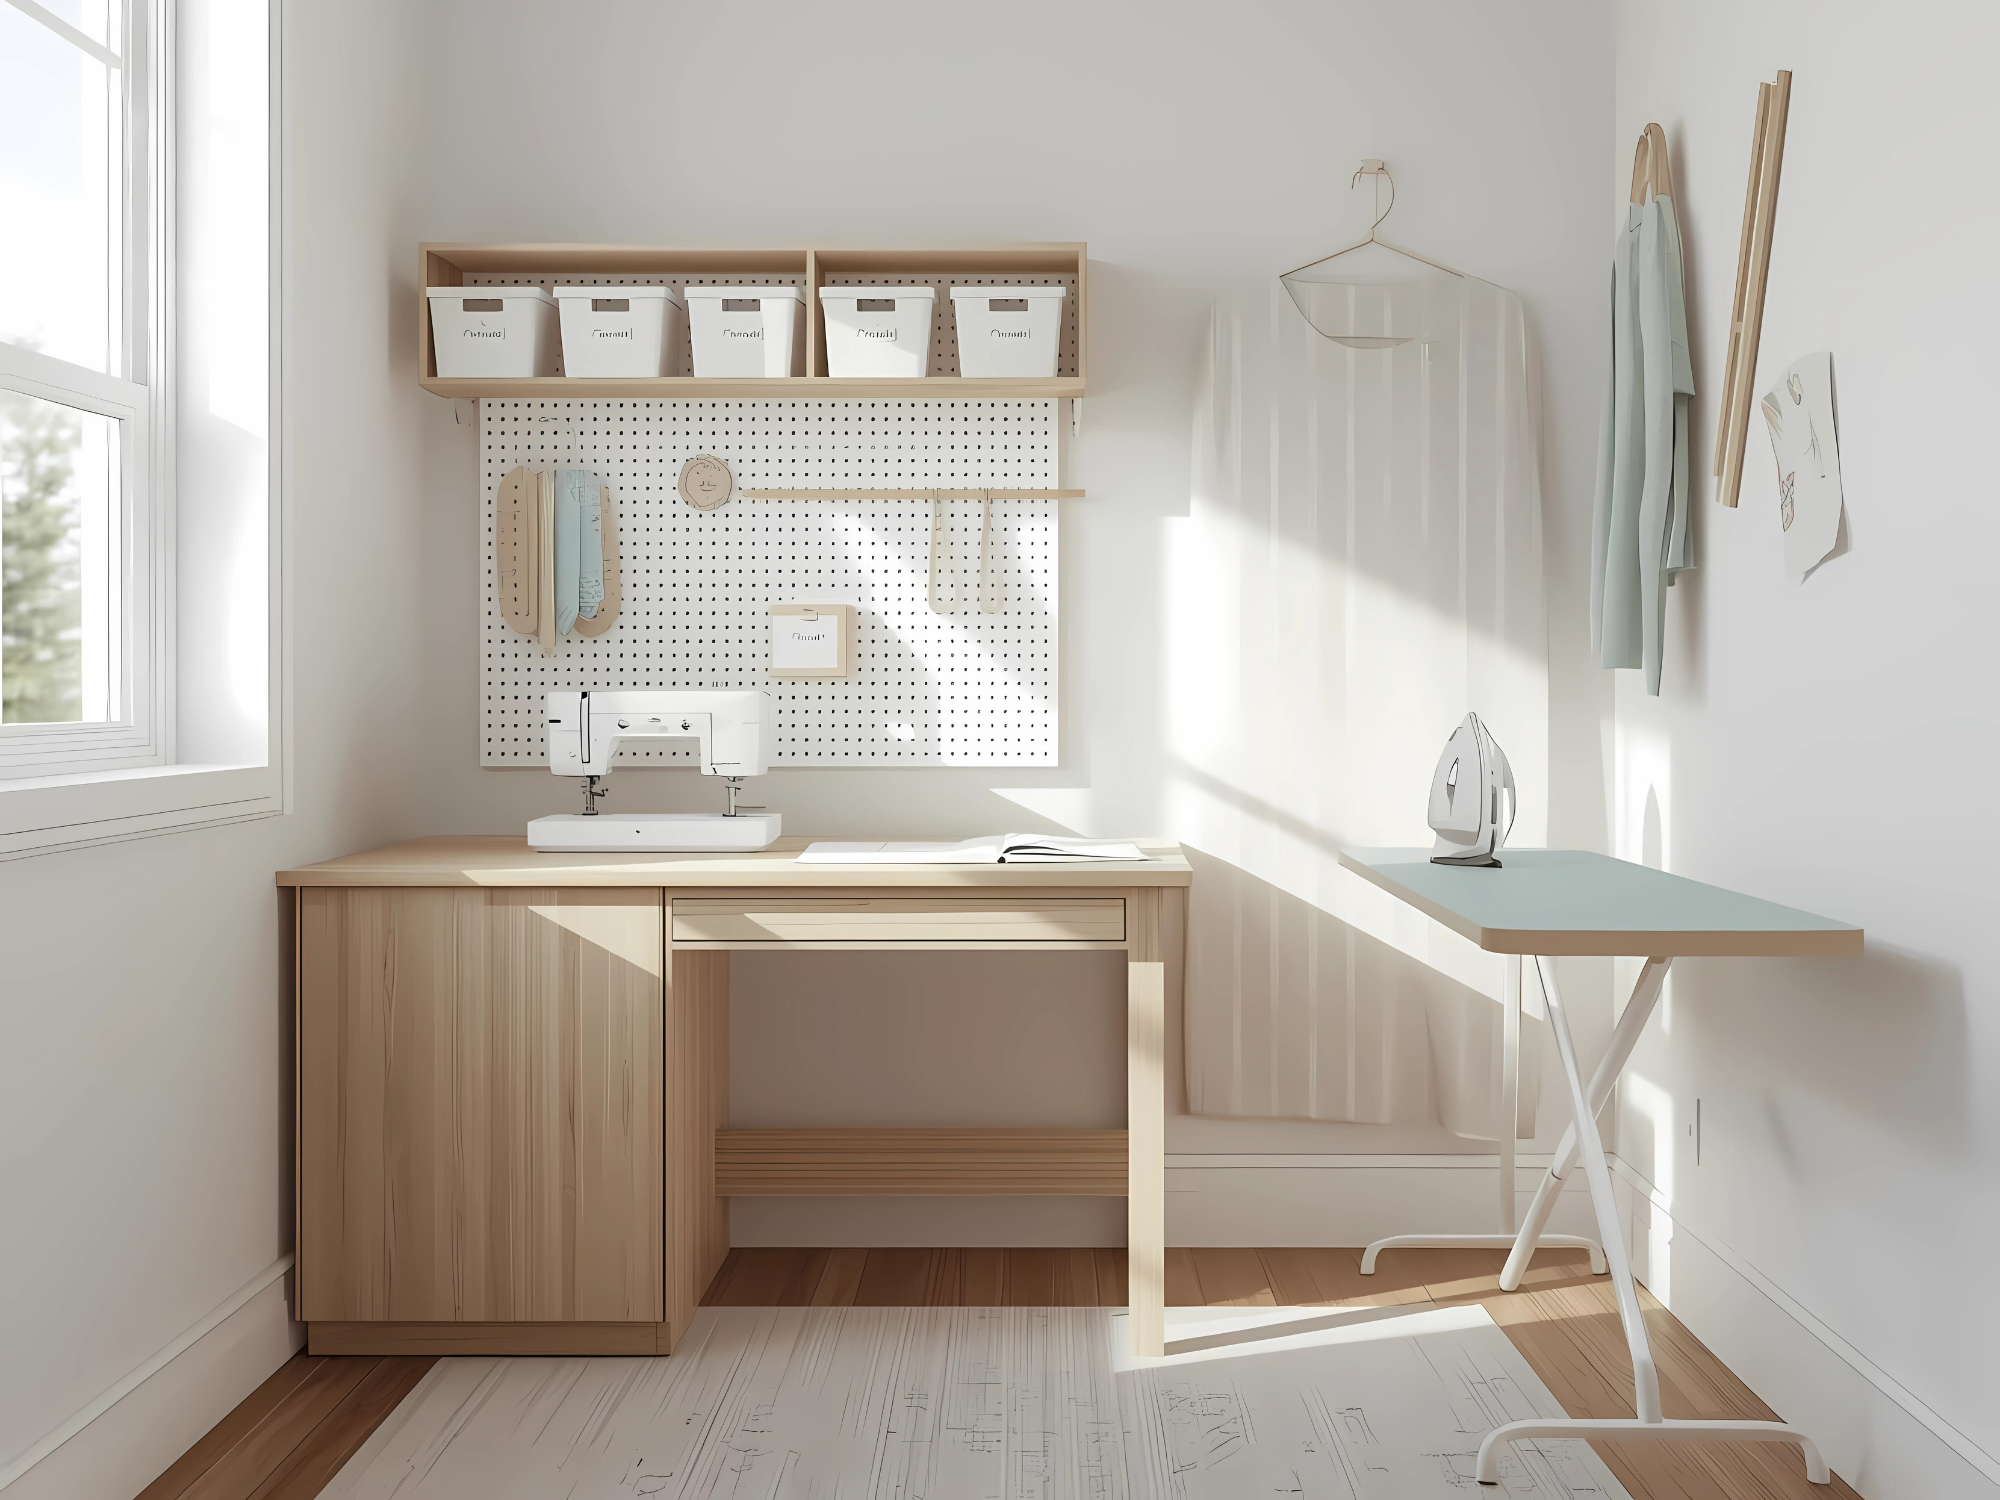
Pressing Station: Fast Press, Better Seams
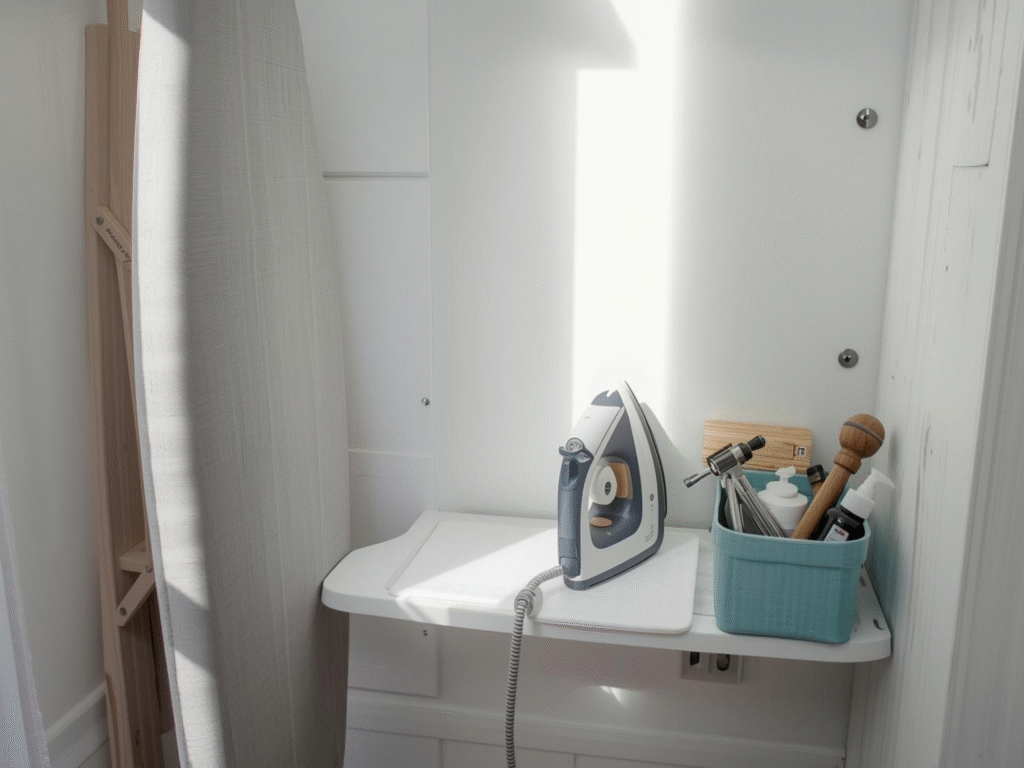
Good pressing makes your projects look professional. Keep your iron hot, safe, and close.
Must-haves
- Iron and board or a heat-proof tabletop press pad
- Spray bottle or steam option
- Tailor’s ham, seam roll, and clapper stored in a small bin
- Heat-safe parking space for the iron
Placement tips
- Many sewists set pressing height near their cutting height for comfort and fewer posture changes. If your board is adjustable, set it just below your standing elbow for easy reach.
- If space is tight, mount a fold-down wall board.
- Keep water near but not on the cord path to avoid snags.
For a deep dive on pressing tools and setup, this guide expands on what a dedicated pressing station can include.
How to Place the Triangle in a Small Room
You can use the triangle in many craft room setup shapes:
- L-shape
Put the sewing station on the short leg, cutting on the long leg, and the pressing station at the inner corner on a fold-down board. This keeps turns short and cords along the wall. - U-shape
Sewing in the middle, cutting on one side, pressing on the other. You spin your chair to move between tasks. Great for tiny rooms. - One-wall studio
Table for the sewing station sits at center, cutting table on risers to the left, pressing pad to the right on a cabinet. This is not a perfect triangle, but it still follows the zone idea that saves steps. The same zone thinking is what many kitchen designers now use when they shift from a strict triangle to flexible “zones” for modern needs.
Need visual layouts you can print and mark up? Grab our free room mockups on Trusti ASG.
Storage That Follows the Triangle
A clean sewing room layout is mostly about what you do not move. Keep each zone stocked with only what that zone needs.
- Sewing station
Feet, bobbins, needles, thread, small tools. Use a shallow drawer insert and label each slot. - Cutting station
Mats, rulers, pattern weights, tape, tracing paper, markers. Hang rulers to save surface space. - Pressing station
Ham, seam roll, clapper, spray bottle, starch or pressing cloths. Add a small shelf under the board.
If you must stash fabric, place bins near the cutting station, not by the machine. That stops piles from drifting onto your stitch path.
Power, Light, and Safety
- Power
Use a surge protector with a master switch for the sewing station and iron on a separate circuit if you can. Keep cords off the floor with clips along the wall. - Light
Put bright, even light over the cutting station and a focused task lamp at the sewing station. Avoid glare on rulers. - Floor
A low-pile rug or anti-fatigue mat near cutting and pressing can help standing comfort.
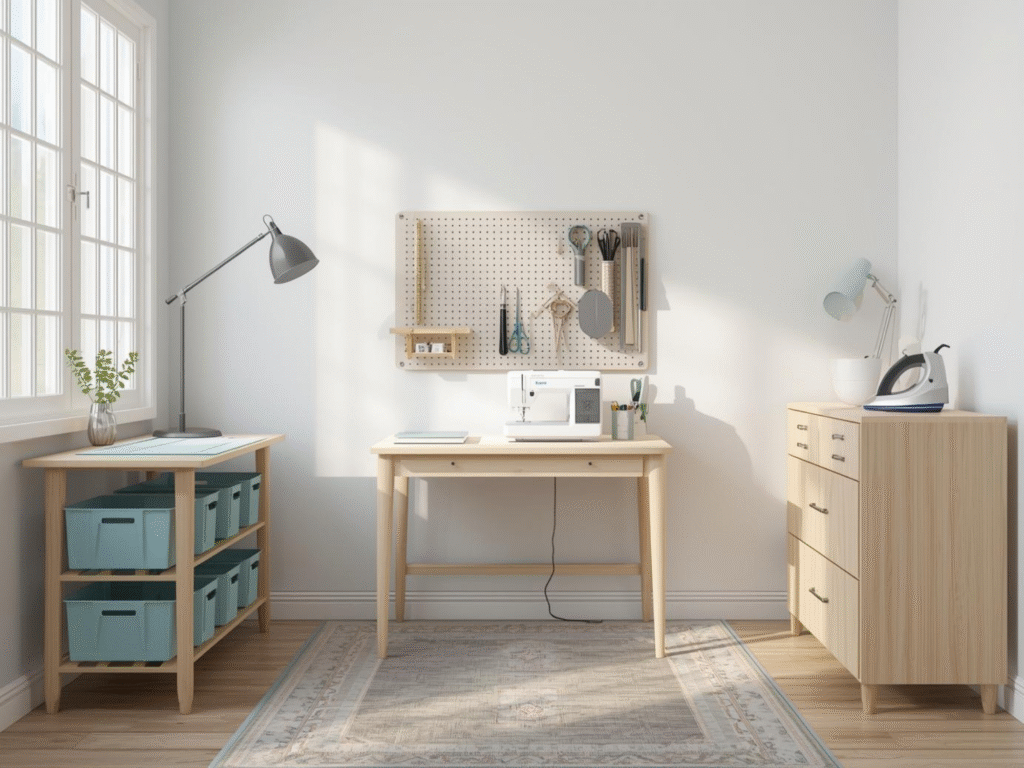
A Sample 6 x 9 Foot Room Plan
Here is a simple plan that fits a lot into a small space.
- Short wall
Place the sewing station in the center of the wall. Pegboard above holds scissors and feet. Cart to the right holds thread and notions. - Long wall, left
Cutting station with a 24 x 36 inch mat on an adjustable table. Hooks at the end hold rulers. Fabric bins stack under. - Long wall, right
Pressing station with a fold-down board. Iron sits on a shelf with heat-proof pad. Tools like ham and clapper live in a basket under the shelf.
You now have a tight triangle with clear paths and no overlap.
Quick Checklist To Set Your Space Today
- Draw your room and mark outlets and light.
- Pick spots for the sewing station, cutting station, and pressing station.
- Form a triangle with clear walkways.
- Adjust table and board heights to fit your body.
- Stock each zone with only what it needs.
- Hang rulers, add bins, and label.
- Test a simple project and time your steps. Move items until it feels smooth.
Free The Sewing Triangle Interactive Template
Download the free, easy-to-use template in the link below to make life a little easier for you as you start your fast crafting journey:
Final Word
A good sewing room layout is not about a big room. It is about smart zones and short steps. When I set up my own craft room setup with the triangle in mind, I stopped shifting piles and started finishing more. Try these craft space ideas and place your stations with care. Even the tightest corner can hold a strong flow.For more space craft ideas you can use this week, browse our articles on Trusti ASG. You will find simple changes that cut steps, save time, and make sewing fun again.